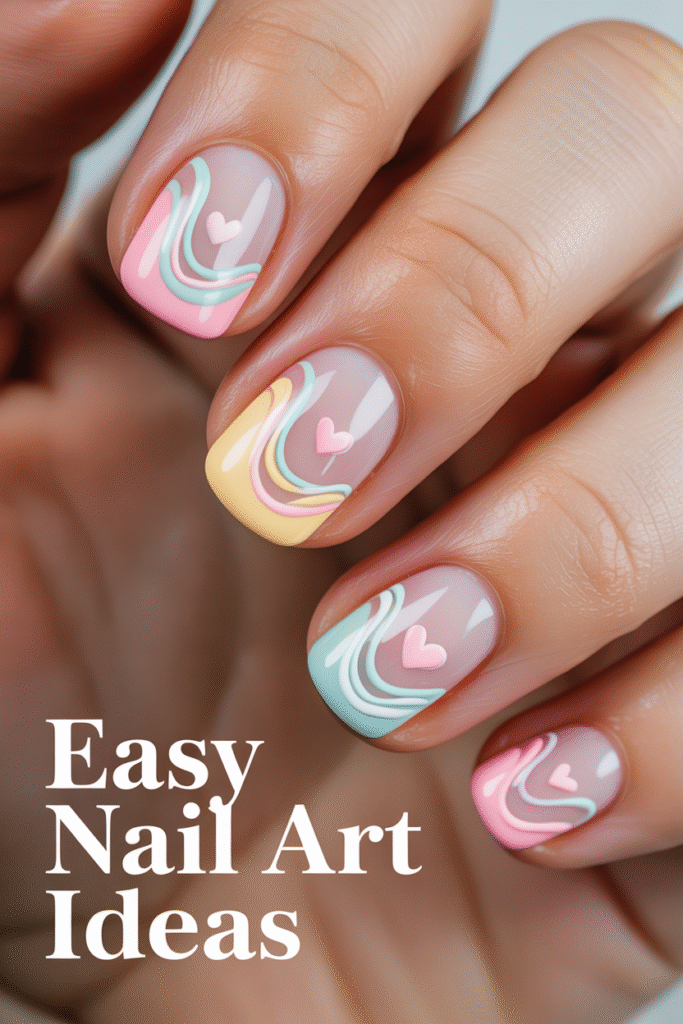
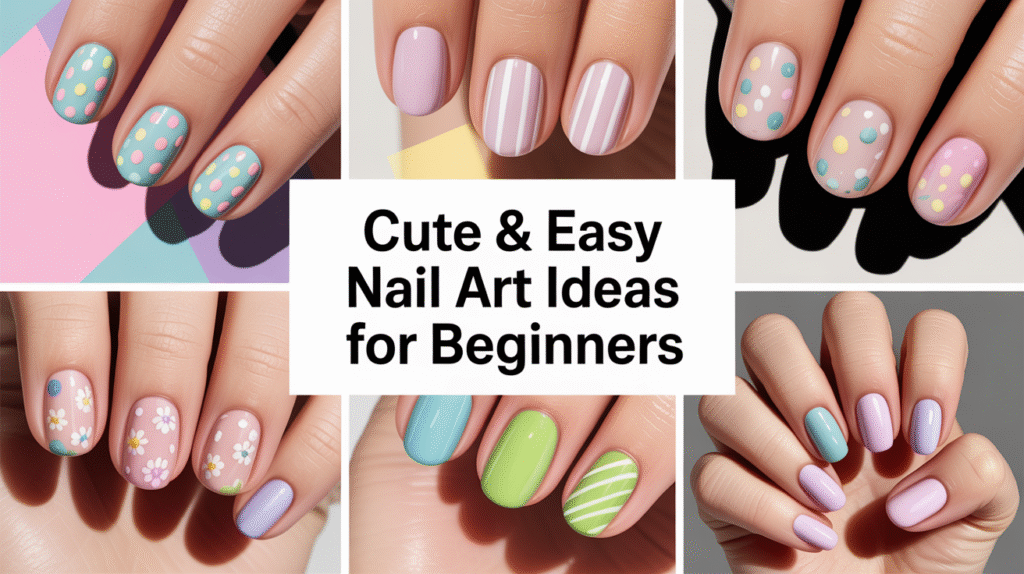
If you’re just starting your nail art journey, you’re in the perfect place! Cute & Easy Nail Art Ideas don’t require professional skills—just a little creativity, a steady hand, and the right inspiration. Whether you love soft pastels, bold colors, or minimalist accents, there are so many beginner-friendly ideas you can try right at home. This guide is packed with simple designs that look stunning without needing advanced tools.
Cute & Easy Nail Art Ideas for Beginners
Nail art doesn’t have to feel overwhelming. Many trending looks—including polka dots, color-block patterns, simple florals, and swirl lines—are surprisingly easy to recreate. With just a dotting tool (or even a toothpick), striping brush, or basic nail art pens, you can transform your nails in a matter of minutes. These designs are quick, cute, and totally doable for beginners.
Whether you’re getting ready for a special occasion, updating your seasonal look, or simply experimenting for fun, these beginner-friendly nail art ideas will help you create picture-perfect nails that shine on Pinterest. Let’s dive into adorable, easy designs you can try today—no salon required!
1: Polka Dot Accent Nails (Cute, Fast & Beginner-Friendly)
Polka dot nails are one of the easiest and most adorable designs for beginners. They require minimal tools and look great with almost any color combination. Whether you prefer soft pastel dots or bold contrasting shades, this design instantly adds charm to your nails without needing steady, advanced brushwork. It’s a perfect starting point for anyone who wants something cute, quick, and totally Pinterest-worthy.
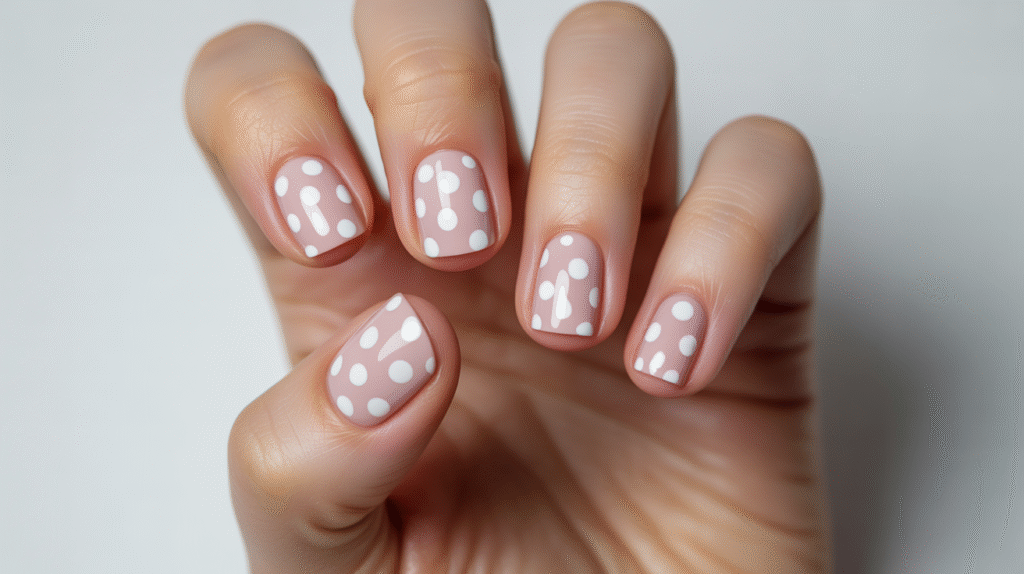
The best part about polka dot nail art is how customizable it is. You can choose a single accent nail, alternate dot sizes, or create patterns like diagonal lines or scattered dots. Even if your dots aren’t perfectly spaced, the look still appears fun and playful—making it a very forgiving design for beginners. You can also experiment with seasonal themes, like white dots for winter “snow,” neon dots for summer, or metallic dots for a glam touch.
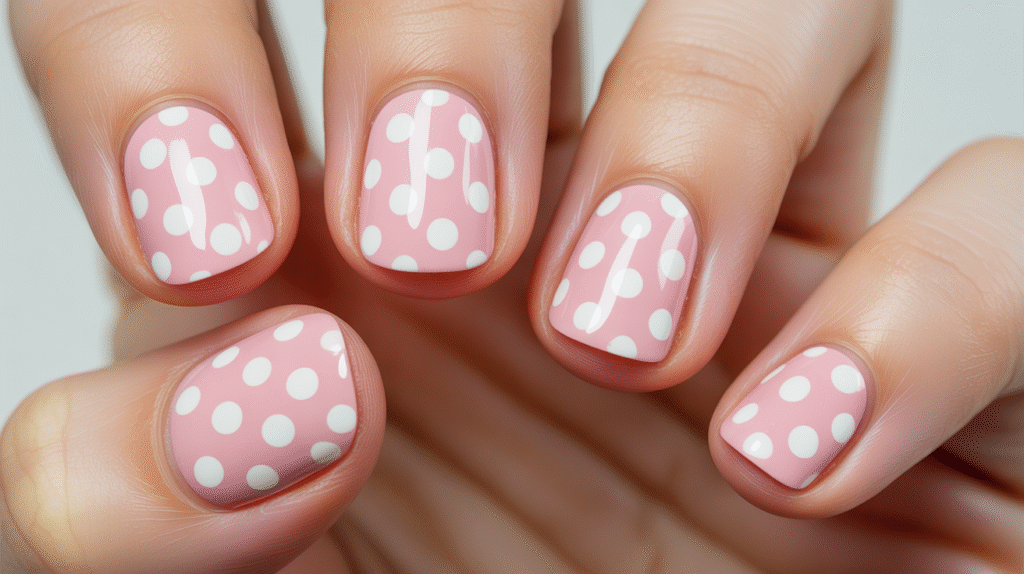
To create this design, all you need is a base color, a dotting tool (or a toothpick, the tip of a bobby pin, or even a ballpoint pen that no longer writes), and a contrasting nail polish shade. Apply your base coat, let it dry, then gently tap your tool into the second color to create dots. Finish with a top coat for smooth, glossy nails that last longer. This simple technique gives you a polished final look with almost no effort.
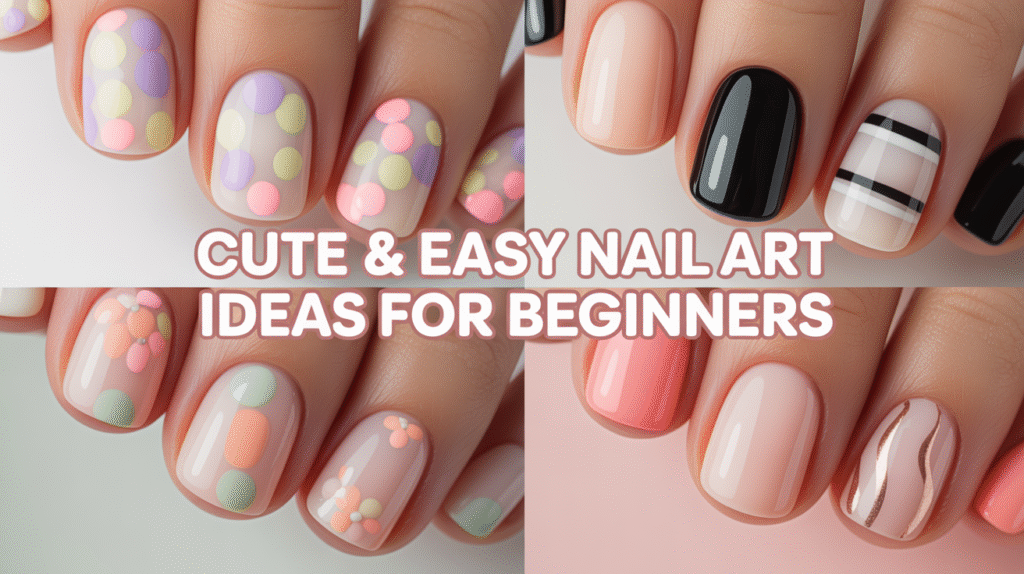
2: Minimalist Stripe Nails (Clean, Modern & Super Easy)
Minimalist stripe nails are perfect for beginners who want a sleek, modern look without complicated techniques. A simple vertical or horizontal stripe can instantly transform your nails into something chic and trendy. This design works beautifully with neutrals, pastels, or bold shades, making it easy to match any outfit or mood. Even one clean stripe on an accent nail can create a professional-looking manicure in minutes.
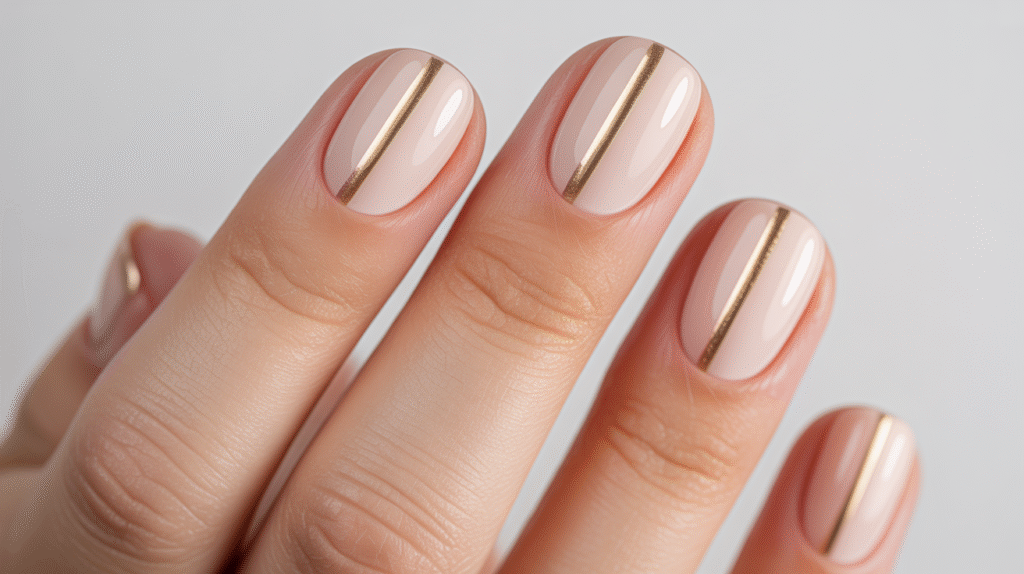
What makes stripe nails great for beginners is the flexibility. You can use striping tape for perfectly crisp lines or freehand the stripe with a thin nail art brush for a softer, more organic finish. Whether you choose metallic gold, classic black, or a soft pastel shade, the single-stripe effect adds elegance without overwhelming the design. It’s also a great introduction to learning control with thin brushes and line work.
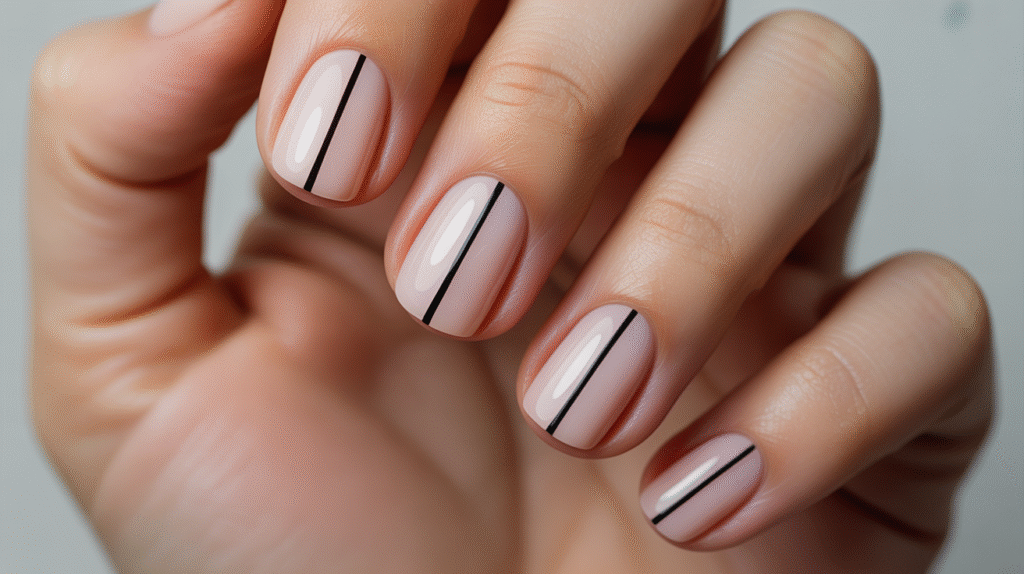
To create this look, start with a smooth base coat and apply your chosen base color. Once completely dry, place striping tape or use a thin brush to paint your stripe—down the center, off to the side, or across the tip for a “micro-French” effect. Seal the design with a glossy or matte top coat. The result is polished, Pinterest-worthy nails that look stylish yet effortless.
3: Simple Flower Dots (Cute, Soft & Beginner-Friendly Blossoms)
Floral nail art may look intricate, but beginner-friendly flower dots are surprisingly easy and perfect for adding a soft, feminine touch to your nails. This design uses the same dotting technique as polka dots, but arranges the dots into tiny flowers. With just 5–6 dots in a circle and a contrasting center dot, you can create adorable mini blossoms that look delicate and Pinterest-ready. It’s a great design for spring, summer, or anytime you want something cute and uplifting.
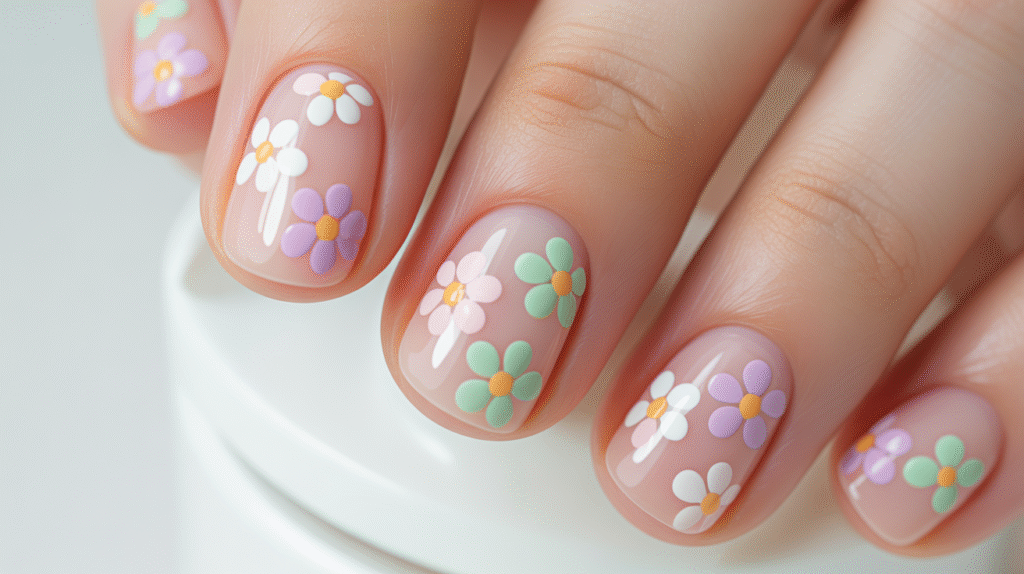
The versatility of dotted flowers makes this design perfect for beginners. You can place a single flower on each nail for a minimal look, cluster a few tiny blooms for more detail, or make one accent nail the “feature floral.” The flowers can be created in any color palette—pastels for soft vibes, brights for a cheerful pop, or metallic centers for an elegant twist. Even if your dots aren’t perfectly symmetrical, the design still looks charming and playful.

To create this look, start with your favorite base color—nudes, pinks, and whites work especially well. Use a dotting tool, toothpick, or bobby pin to add five equal-sized dots in a circle. Then add a small contrasting dot in the center to complete the flower. Allow the dots to dry to avoid smudging, then apply a top coat to smooth and seal the design. With just a few steps, you get adorable floral nails that feel salon-worthy but are totally beginner-friendly.
4: Two-Tone Color Block Nails (Bold, Fun & Beginner-Friendly)
Two-tone color block nails are perfect for beginners who want a stylish, bold look without complicated techniques. This design uses two complementary or contrasting colors divided diagonally, vertically, or horizontally on each nail. The clean separation of colors creates a modern, eye-catching effect that instantly elevates your manicure. It’s a great way to play with color without being overwhelming or time-consuming.
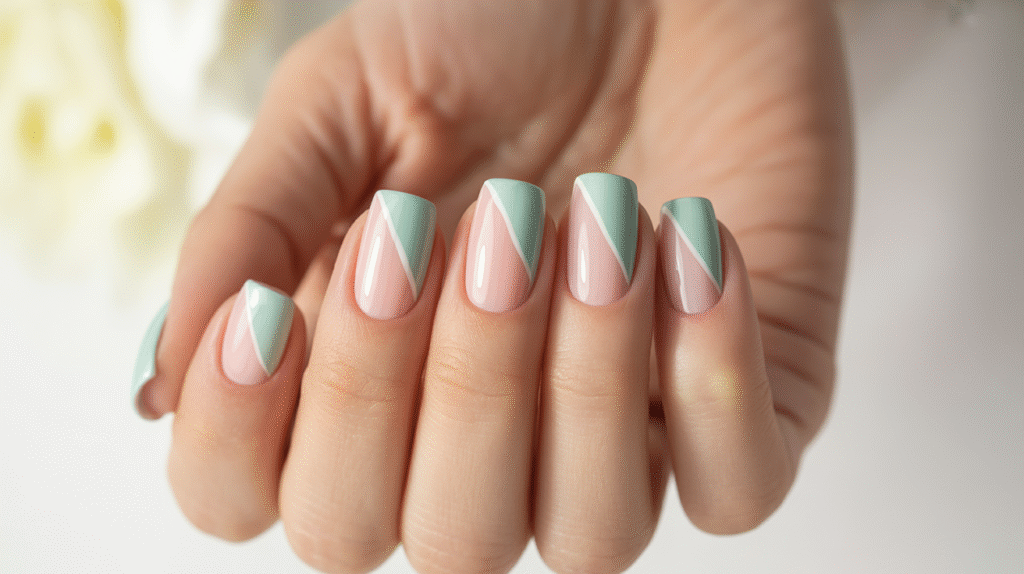
The beauty of color block nails is how customizable they are. You can mix pastels for a soft, dreamy look, pair bold neons for a fun summer vibe, or use neutral shades for a chic, minimalist aesthetic. The design works well on all nail lengths and shapes, and even small imperfections blend beautifully once the top coat is applied. Whether you create the block on every nail or choose one or two accent nails, the result always looks trendy and Pinterest-worthy.
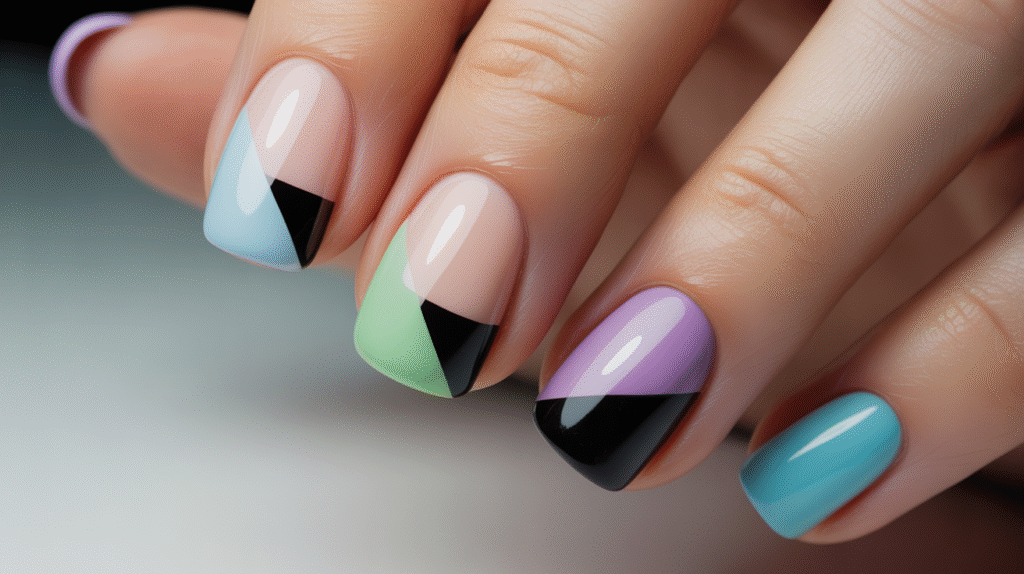
To create this design, apply your base color and let it dry completely. Use painter’s tape, striping tape, or even a steady freehand line to create your block shape. Paint the second color on the open section and remove the tape carefully while the polish is still wet for a crisp line. Once dry, seal everything with a glossy or matte top coat. This simple technique gives your nails a professional, geometric finish with minimal effort.
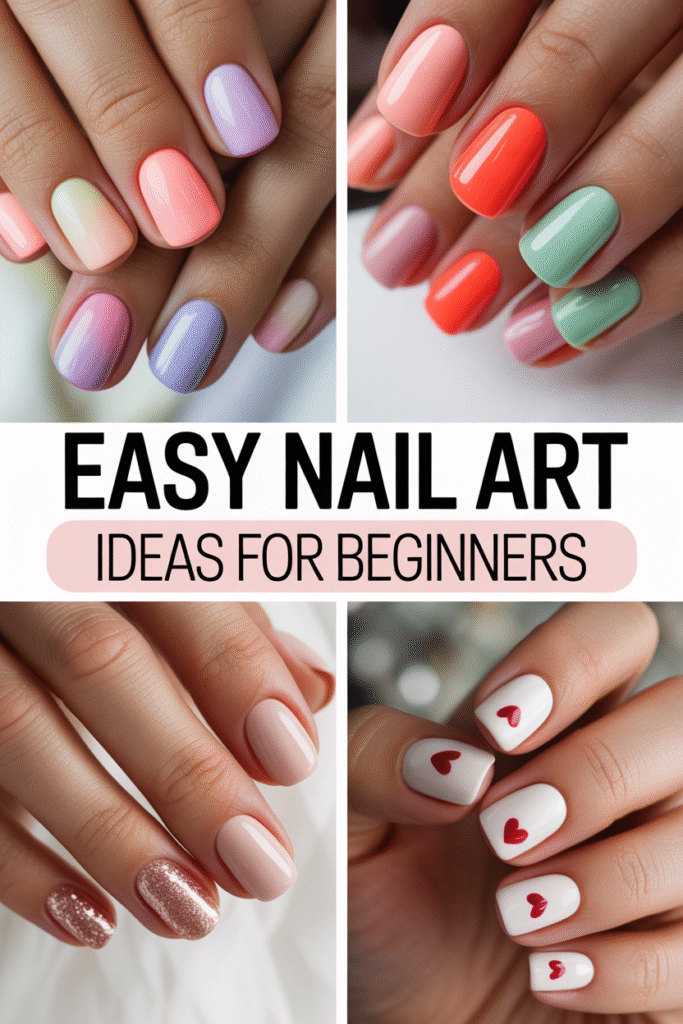
5: Glitter Accent Nail (Quick, Sparkly & Perfect for Any Occasion)
If you want a beginner-friendly nail design that looks glamorous with almost no effort, glitter accent nails are the perfect choice. This design features one or two nails coated in glitter polish while the rest remain solid-colored, creating a beautiful contrast that instantly catches the eye. It’s ideal for parties, date nights, holidays, or anytime you want a touch of sparkle without needing detailed nail art skills.
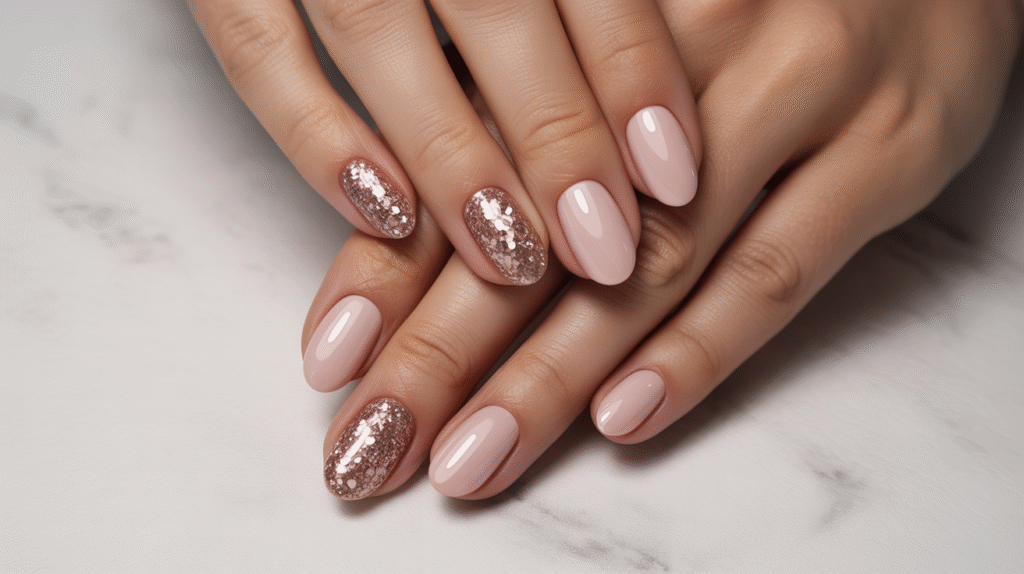
The best part about glitter accent nails is their flexibility. You can choose fine glitter for a subtle shimmer, chunky glitter for a bold sparkle, or holographic glitter for a trendy, multidimensional effect. Pairing a neutral base with a gold or silver glitter accent gives a chic, sophisticated vibe, while vibrant colors with matching glitter create a fun, playful look. The design works effortlessly for short or long nails, making it a go-to option for beginners.
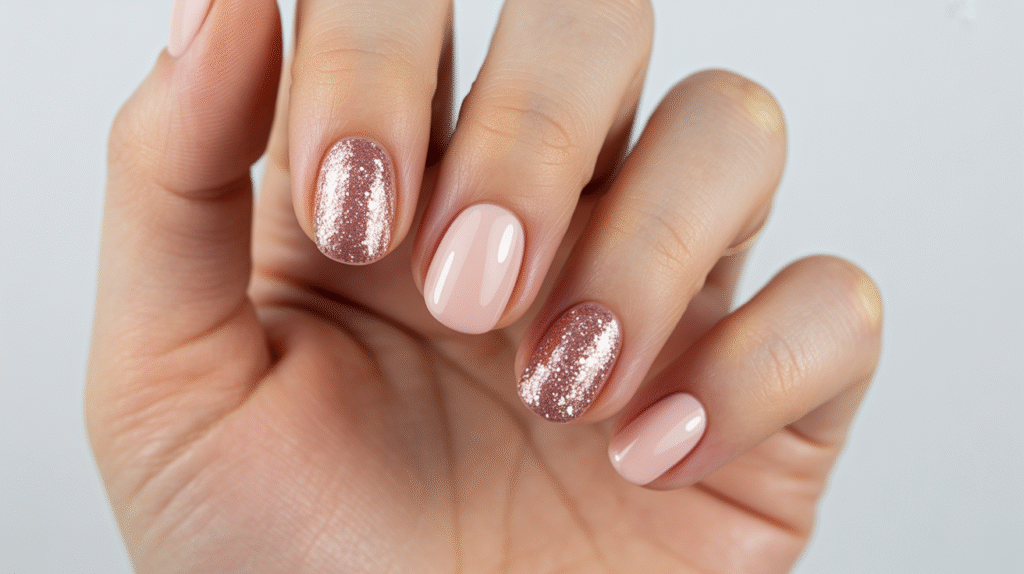
Creating this look is incredibly simple. Start by applying your base color to all nails. Once dry, paint your chosen accent nails with glitter polish—two coats are usually enough for full coverage. If you want an ultra-sparkly finish, gently dab glitter onto the nail instead of brushing it. Seal everything with a top coat to prevent chipping and enhance the shine. With minimal steps, you get a dazzling manicure that looks like you spent a lot more time on it than you actually did.
6: Micro-French Tips (Tiny, Chic & Beginner-Friendly Twist)
Micro-French tips are a modern twist on the classic French manicure, making it easier and more beginner-friendly. Instead of a thick white tip, this design uses a super-thin line along the nail’s edge, giving your nails a clean, elegant, and minimalistic look. The tiny tip is much more forgiving, meaning even if the line isn’t perfectly straight, it still appears polished and stylish. It’s the perfect choice for anyone wanting a classy design without the pressure of precision.
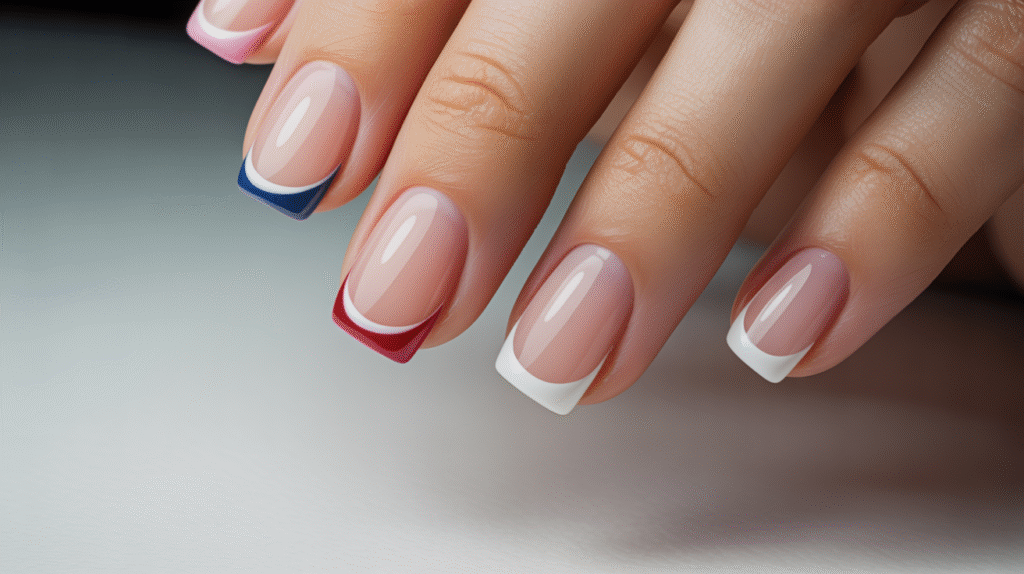
What makes micro-French tips special is how versatile they are. You can go classic with white tips or experiment with trendy colors like gold, neon, pastel blue, or even glitter. The design complements both short and long nails and looks especially stunning on almond, round, and square shapes. Because the tip is so thin, the look stays subtle yet sophisticated—ideal for everyday wear, office-friendly nails, or minimal Pinterest-inspired aesthetics.
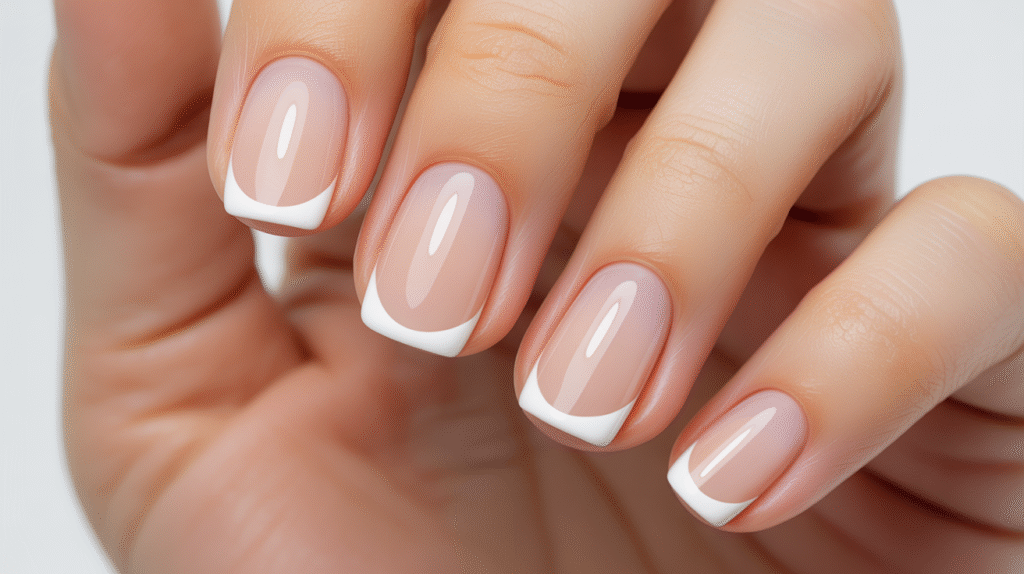
To create this look, start with a nude or sheer base coat. Once it dries, use a thin brush or the side of the polish brush to add a delicate line at the edge of the nail. If you prefer crisp lines, use nail guides or tape. Finish with a glossy or matte top coat to protect your design and enhance the finish. With just a few steps, you get chic, effortless nails that look professionally done.
7: Pastel Ombre Nails (Soft, Dreamy & Surprisingly Easy)
Pastel ombre nails look professional, but with the right technique, they are totally beginner-friendly. This design blends two or more soft colors—like lavender and baby blue or peach and pink—creating a smooth, dreamy gradient. The result is a soft, cloud-like effect that looks stunning in photos and instantly gives your nails a Pinterest-perfect vibe. Even if the blend isn’t flawless at first, the gentle pastels make imperfections barely noticeable.
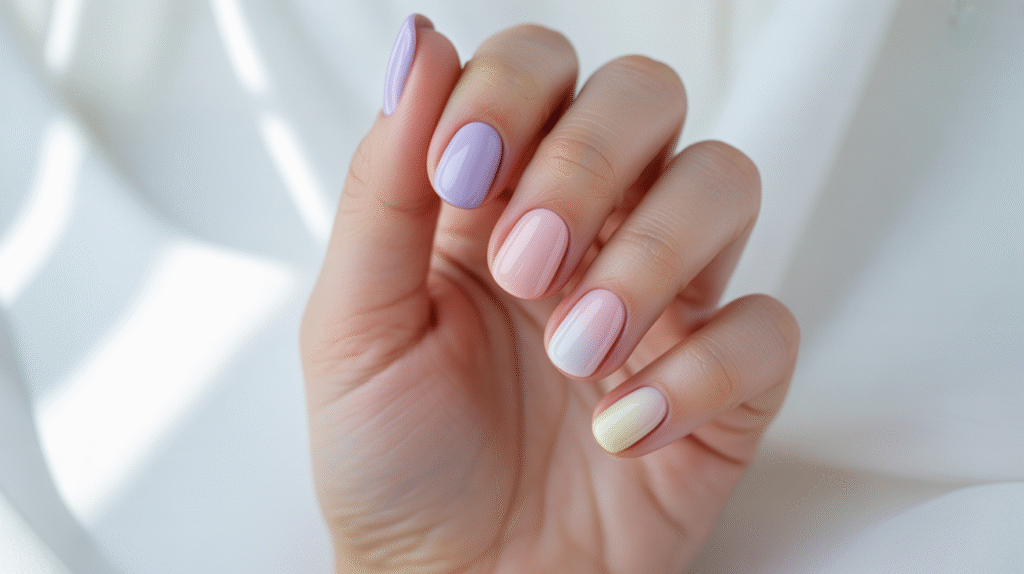
The magic of pastel ombre is its versatility. You can create a vertical, horizontal, or diagonal gradient depending on the style you prefer. Lighter colors are easier to blend, making them ideal for beginners experimenting with sponging techniques. You can also customize the look for any season—think mint and yellow for spring, coral blends for summer, or muted lilacs for a year-round soft glam style. Add a glitter top coat for an extra dreamy finish.
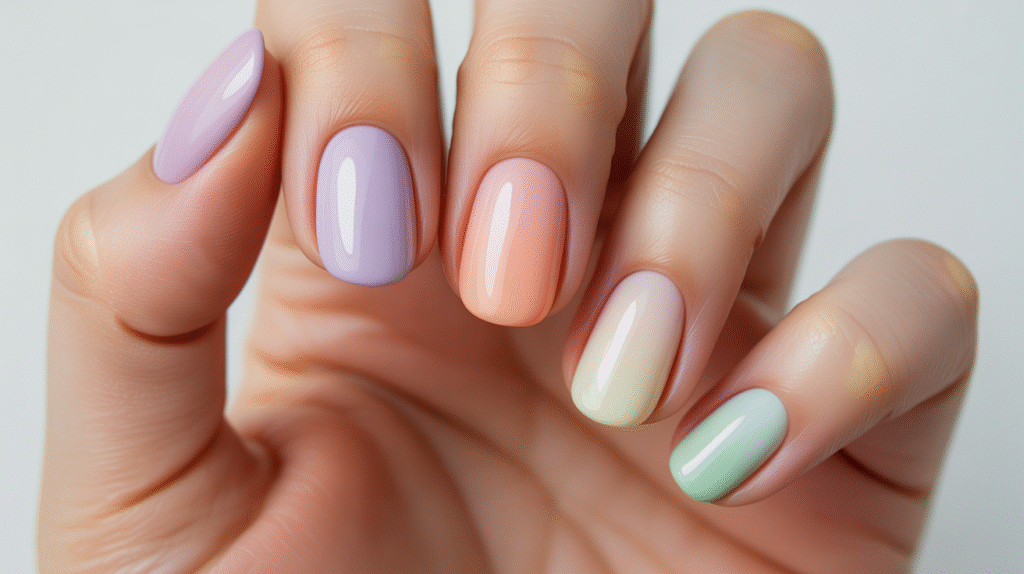
To create this look, apply a white or very light base to help the pastel colors pop. Then paint your chosen colors side-by-side on a small makeup sponge and lightly dab it onto the nail, repeating until you achieve the perfect blend. Clean the edges with a brush dipped in remover and finish with a glossy top coat to smooth everything out. In just a few steps, you’ll have soft, blended nails that look salon-worthy without the effort.
8: Heart Accent Nails (Cute, Sweet & Perfect for Beginners)
Heart accent nails are one of the easiest ways to add a cute, romantic touch to your manicure. With just a dotting tool—or even a toothpick—you can create tiny heart shapes that look adorable and Pinterest-ready. Whether you place a single heart on each nail or make one accent nail the focus, the design instantly transforms your nails into something sweet and eye-catching. It’s perfect for Valentine’s Day, date nights, or anytime you want a soft, charming look.
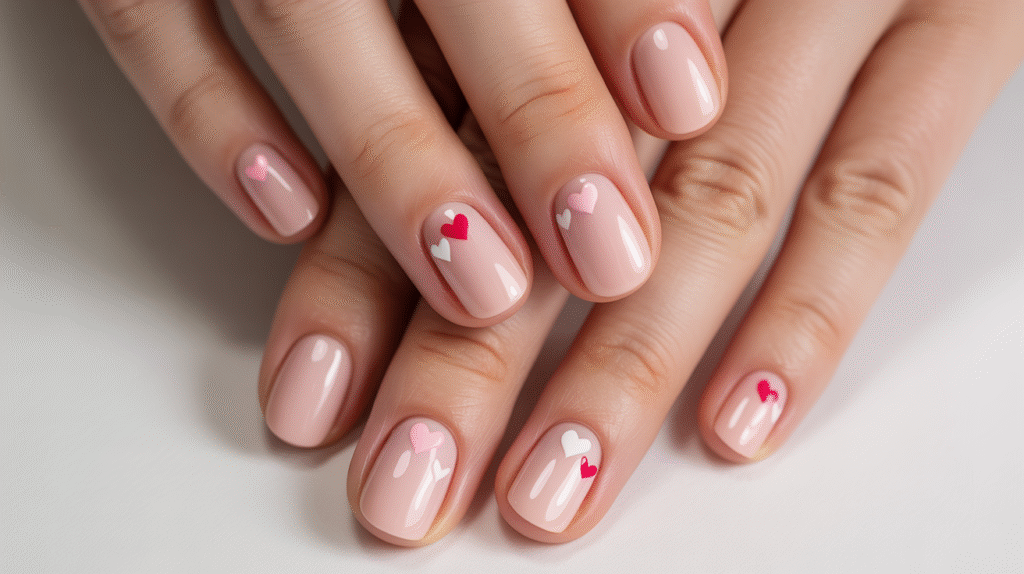
This beginner-friendly design is incredibly flexible. You can create hearts in classic red, go pastel for a softer aesthetic, or use metallic shades for a modern twist. Hearts can be large, tiny, centered, off to the side, or used in pairs for a more playful vibe. Even if the shapes aren’t perfectly symmetrical, they still look cute and hand-crafted, which adds to the charm of beginner nail art.
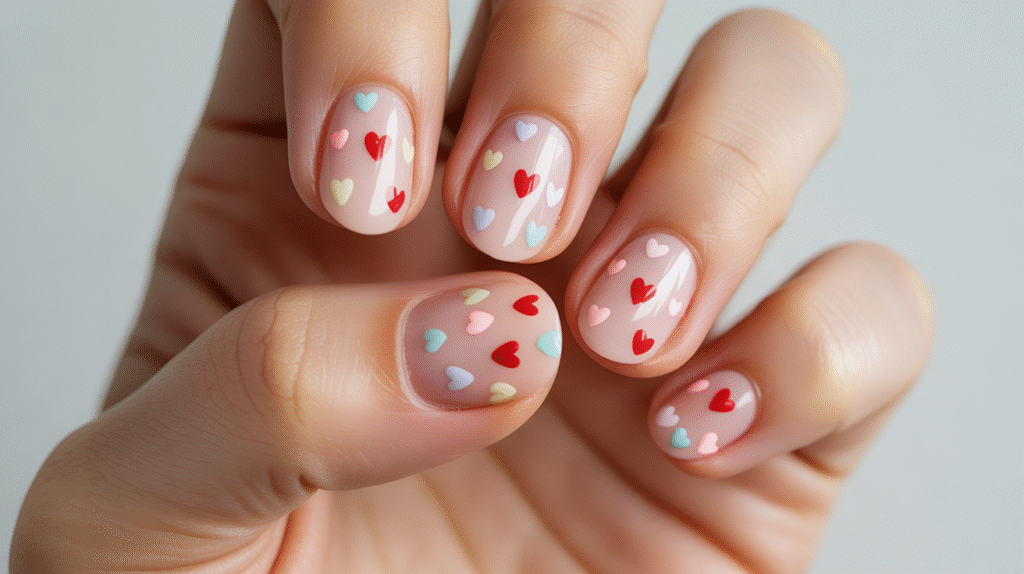
To create the heart shape, start with a smooth base color—pinks, nudes, and whites work especially well. Dip your dotting tool into your chosen polish and make two dots close together. Then drag the polish downward with a thin brush or toothpick to form the bottom point of the heart. Seal everything with a top coat to protect the design and give it a glossy finish. In just minutes, you’ll have sweet, love-inspired nails that look effortlessly cute.
9: Swirl Line Nails (Trendy, Artsy & Beginner-Friendly)
Swirl line nails are one of the biggest Pinterest and Instagram trends—and the best part is, they’re surprisingly easy for beginners. These flowing, abstract lines create a soft, artistic look that feels modern and playful. Because the lines don’t need to be perfectly symmetrical or identical, this design is extremely forgiving, making it ideal if you’re new to nail art. Even simple one- or two-color swirls instantly elevate your manicure.
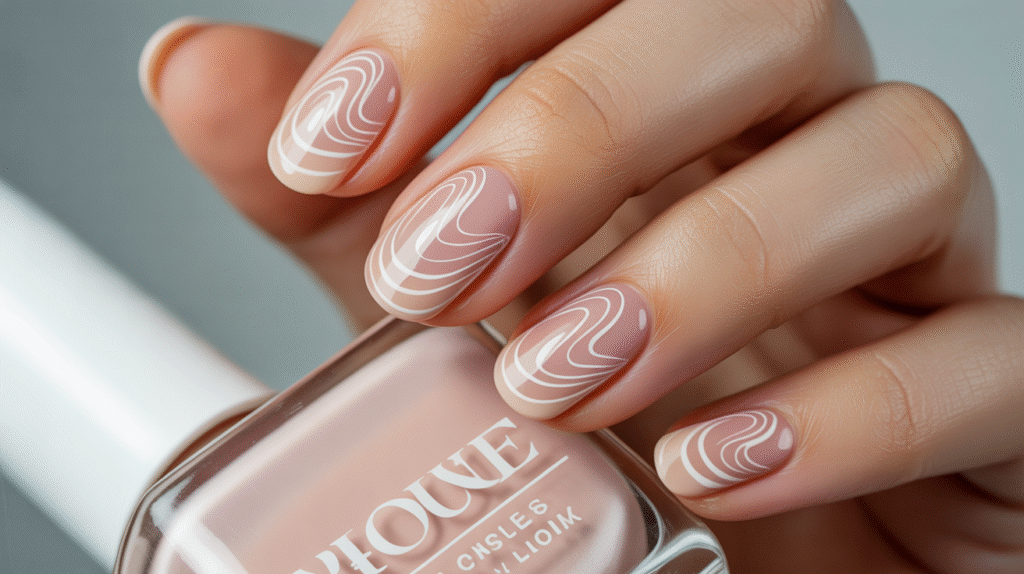
The beauty of swirl nails is the freedom to personalize them. You can go for soft pastel swirls for a dreamy vibe, bold neon lines for a fun summer look, or earthy tones for a chic, minimal aesthetic. Whether you place one swirl on each nail or create layered lines for more dimension, the end result always looks trendy and effortlessly artistic. You can also adapt the curves to suit your nail shape—gentle arches for round nails or bold waves for longer ones.
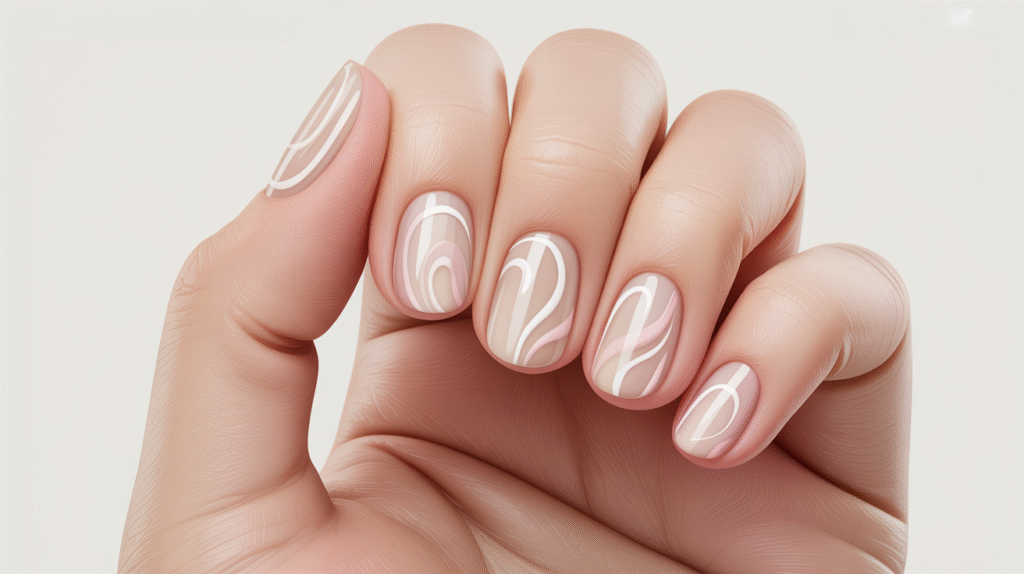
To recreate this look, start with a clean base color such as nude, white, or light beige. Using a thin nail art brush or striping brush, gently paint curved lines across the nail in your chosen shade. You can keep it simple with one swirl or add more layers for a more detailed design. Allow the lines to dry and finish with a top coat to smooth and seal the look. Within minutes, you’ll have modern swirl nails that look straight out of a Pinterest feed.
10: Tiny Star Nails (Sparkly, Magical & Beginner-Friendly)
Tiny star nails are perfect for beginners who want a fun, whimsical design that looks like it took a lot more effort than it really did. These dainty stars add a magical, celestial touch to your nails without requiring precise or complicated techniques. You can create them using simple tools, or even use star-shaped stickers for an even easier version. Whether you choose gold, silver, white, or pastel tones, star accents instantly give your nails a dreamy and Pinterest-worthy look.
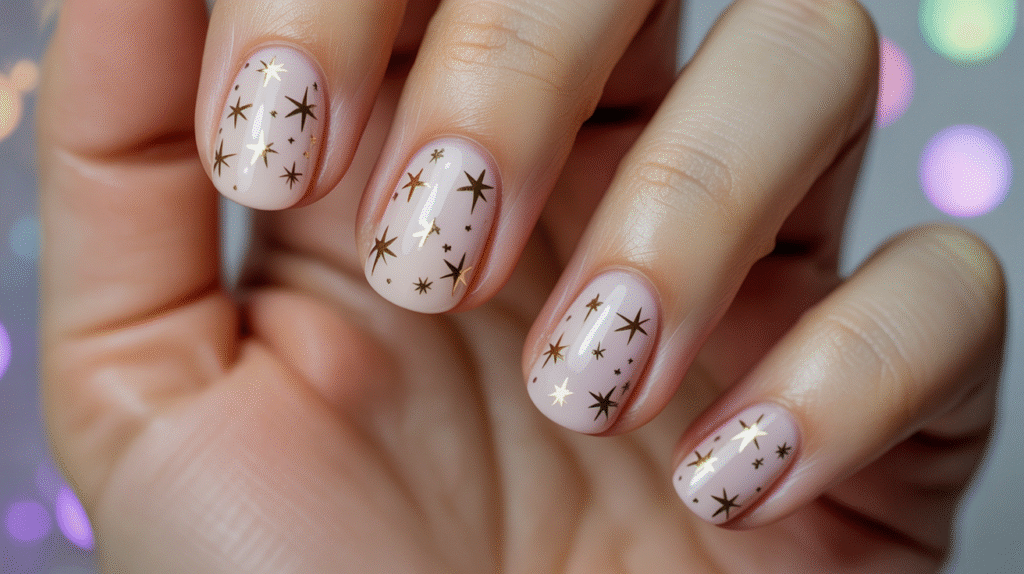
The design is incredibly versatile. You can place a single tiny star on each nail for a clean minimalist vibe, or create little clusters for a more playful and sparkly effect. Mixing star sizes—tiny dots, small stars, and micro-glitter—adds dimension while still staying beginner-friendly. You can also match the theme to any season: icy silver stars for winter, gold stars for parties, pastel stars for spring, or holographic stars for a fun, trendy finish.
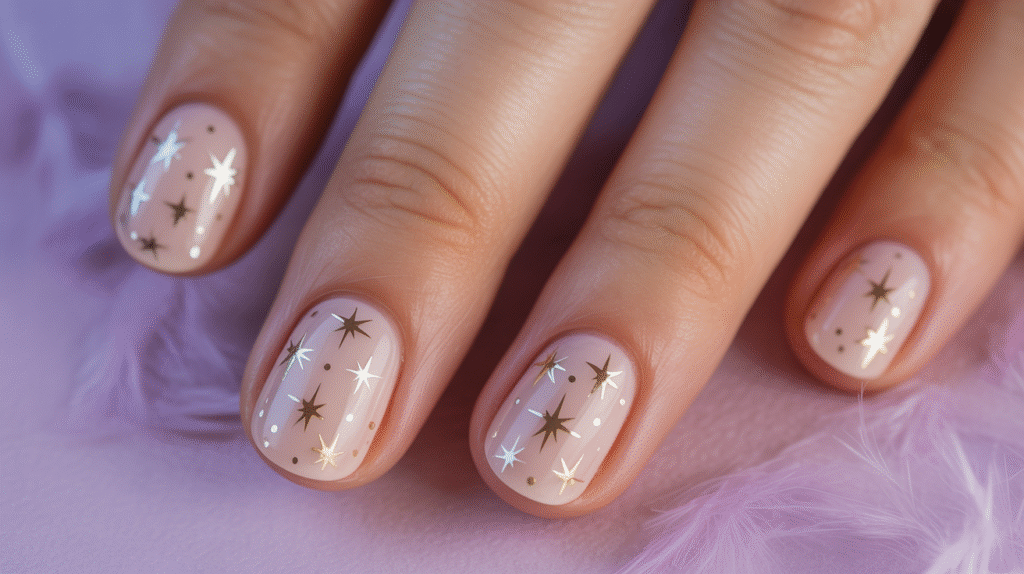
Creating tiny star nails is simple. Start with a smooth base color—nude, soft pink, sky blue, or lavender all work beautifully as a celestial backdrop. Use a thin brush or toothpick to paint tiny star shapes, or apply small star decals or stickers if you prefer an even quicker method. Add small dots around the stars for a scattered “sky” effect. Once dry, seal with a glossy top coat to make the stars shine. In just a few minutes, you’ll have magical, beginner-friendly nails that look polished and enchanting.
Conclusion:
Creating cute and easy nail art doesn’t have to feel intimidating—especially when you’re just starting out. With simple techniques like dots, stripes, swirls, and tiny accents, you can transform your nails into adorable designs that look polished and Pinterest-perfect. These beginner-friendly ideas help you explore creativity, build confidence, and discover which styles you love most without needing professional tools or skills.

Each design in this guide is quick, forgiving, and totally customizable, so you can experiment with colors, shapes, and finishes until you find your signature style. Whether you prefer soft pastels, bold color pops, minimal lines, or a bit of sparkle, there’s a design here to inspire your next at-home manicure. Most importantly, these looks make nail art fun—because creativity should feel joyful, not complicated.
So grab your favorite polishes, try a few of these cute ideas, and let your nails become your new favorite canvas. With a little practice and a whole lot of creativity, you’ll be creating stunning nail designs that look ready for social media in no time!